Space hazards
From level 12, real space objects join the board. They aren't bricks: you can't clear them and you never need to. They bend, catch, slow, split or eat your balls, or make bricks tougher, and some of them can help you.
On this page4 parts
All 33 hazards
In the order you meet them. Each has its own page.
 MeteorLevel 12
 Solar windLevel 15
 WormholeLevel 20
 Ice geyserLevel 22
 Cabin fireLevel 28
 Hungry astronautLevel 30
 Slingshot planetLevel 35
 Fire meteorLevel 40
 AuroraLevel 45
 Black holeLevel 55
 Solar eclipseLevel 60
 PulsarLevel 65
 Radiation beltLevel 70
 Dark nebulaLevel 80
 Io volcanoLevel 88
 UFOLevel 95
 Force fieldLevel 110
 Star nurseryLevel 125
 Neutron starLevel 135
 MagnetarLevel 145
 Hull breachLevel 155
 Ice cometLevel 165
 SupernovaLevel 185
 Solar flareLevel 205
 Asteroid beltLevel 215
 Binary starLevel 225
 Gravitational lensLevel 235
 Space debrisLevel 245
 Time dilation zoneLevel 255
 Rogue planetLevel 265
 Gamma-ray burstLevel 275
 Dark matter haloLevel 285
 Dyson sphereLevel 295
| Hazard | From level | Good or bad? |
|---|---|---|
| Meteor | 12 | Gets in your way |
| Solar wind | 15 | Both: bends balls, burns those that ride it 3 s |
| Wormhole | 20 | Both: unpredictable exit |
| Ice geyser | 22 | Both: fast icy balls, but spreading ice |
| Cabin fire | 28 | Hurts: burns the balls that touch it |
| Hungry astronaut | 30 | Gets in your way |
| Slingshot planet | 35 | Helps: double-damage balls |
| Fire meteor | 40 | Gets in your way |
| Aurora | 45 | Helps: extra shots |
| Black hole | 55 | Both: bends and scatters |
| Solar eclipse | 60 | Both: hides the board, doubles damage |
| Pulsar | 65 | Helps when aimed |
| Radiation belt | 70 | Both: double damage, fries 1 in 5 |
| Dark nebula | 80 | Gets in your way |
| Io volcano | 88 | Both: burning lava, bomb bricks |
| UFO | 95 | Both: swallows, then fires them all out |
| Force field | 110 | Gets in your way |
| Star nursery | 125 | Gets in your way |
| Neutron star | 135 | Both: crushes or pierces |
| Magnetar | 145 | Gets in your way |
| Hull breach | 155 | Both: loses balls, tears out bricks |
| Ice comet | 165 | Gets in your way |
| Supernova | 185 | Helps if broken in time |
| Solar flare | 205 | Gets in your way |
| Asteroid belt | 215 | Gets in your way |
| Binary star | 225 | Gets in your way |
| Gravitational lens | 235 | Both: random but sweeping |
| Space debris | 245 | Gets in your way |
| Time dilation zone | 255 | Helps: many hits inside |
| Rogue planet | 265 | Gets in your way |
| Gamma-ray burst | 275 | Both: beam loses balls, leaves prizes |
| Dark matter halo | 285 | Both: swerves, but doubles balls |
| Dyson sphere | 295 | Helps if destroyed: wipes the stage |
How hazards work
When you meet a new hazard the game shows a card explaining it. The Hazard guide in ⚙ Settings lists the ones you've met, and the level card shows which hazards each level has. Every hazard can be customised: made easier, twisted your way, made harder for bonus points, or given a new look.
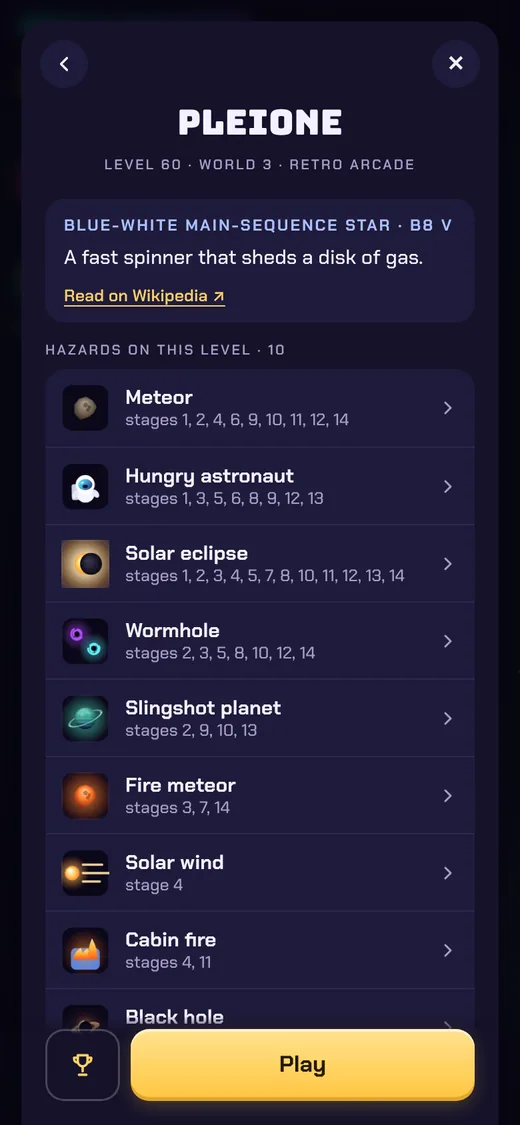
The level card's hazards row lists every hazard on the level and the stages it's on. 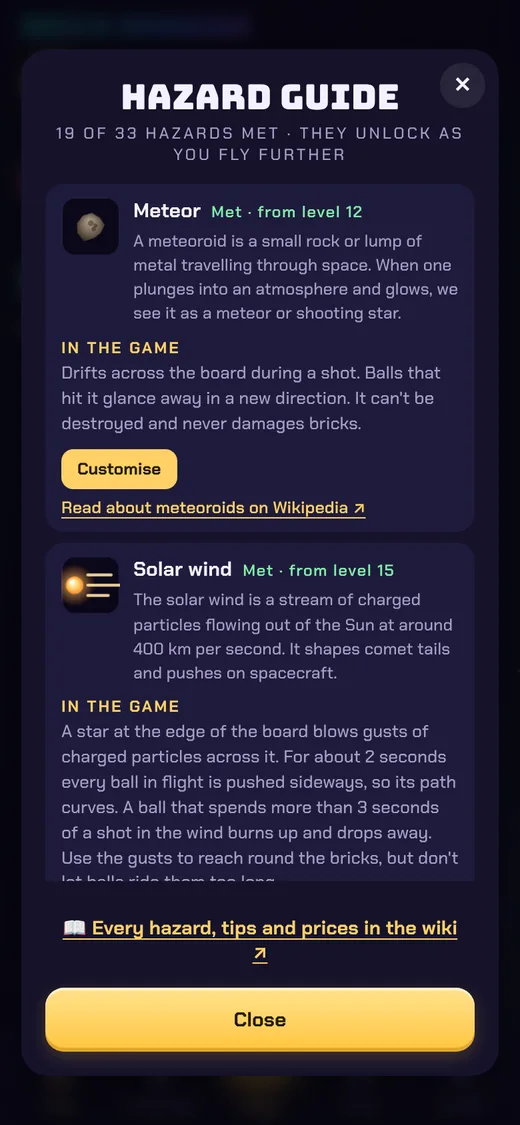
Hazard guide: every hazard you've met, how it works, and Customise.
Sizes are in bricks (the board is 11 bricks wide and 18 rows tall) and times in seconds. Options are described at full strength; a Mastery (forever) option works at about 30% of the change, and a yes-or-no option then works about 30% of the time.
Stronger as you climb
Hazards get stronger as you climb. On a hazard's first level it is at its normal strength. With every level after that it works a little harder, and 150 levels later it is at full strength: meteors bigger and faster, pulls reaching further, beams longer, gusts stronger, eclipses longer, and so on. It's the same for every player on a level.
New hazards get practice: after a hazard's first stage it comes back on about 3 stages in 4 for the rest of that level, then on about half the stages of the next three levels, before settling to its usual chance.
Customising hazards
Every hazard can be changed, 276 options in all. Make one easier, turn it your way, make it harder for extra points, or give it a new look.
Where to open it
- On a level card, tap the hazards row, then the hazard.
- Tap Customise in the Hazard guide (⚙ Settings on the map).
- On the out-of-shots card, open More ways to continue and tap 🛠 Change a hazard and retry to change one for the stage you're on and retry with bonus shots (see Out of shots).
On the level card, tap the hazards row, then the hazard you want to change. 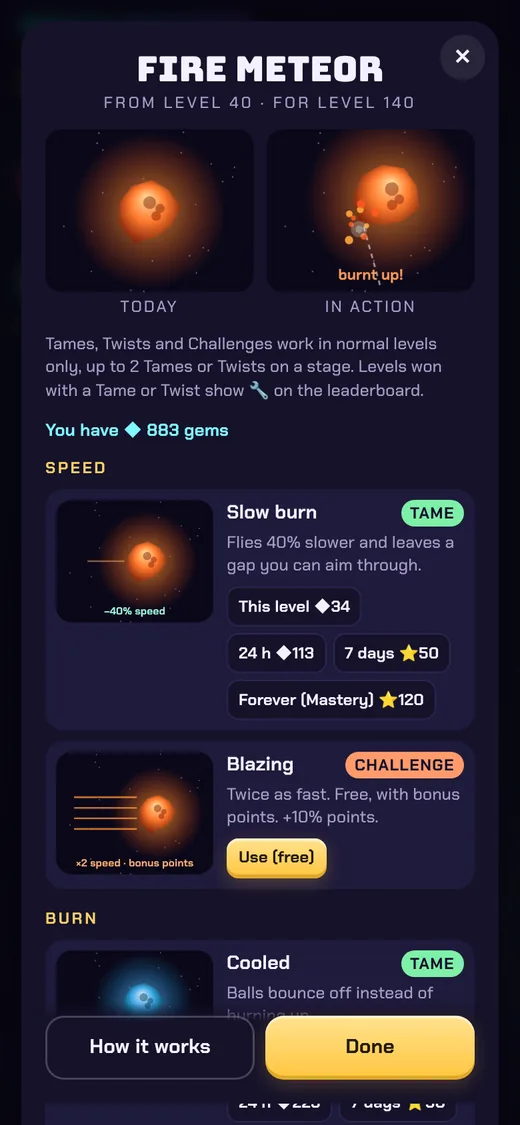
The Customise window for the fire meteor: what it looks like today and in action, then every option with its prices. 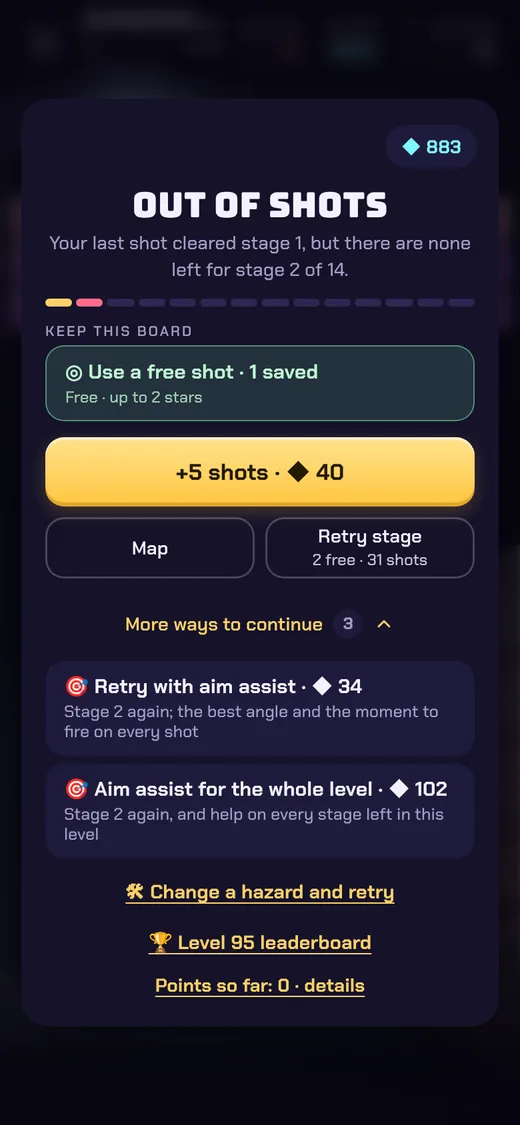
Out of shots? More ways to continue › 🛠 Change a hazard and retry changes a hazard for this stage and retries it with bonus shots.
The four kinds of option
| Kind | What it does | Paid with | Where it works |
|---|---|---|---|
| Tame | Makes the hazard easier: a smaller meteor, a lazier astronaut, shorter pulsar wings… | gems or Telegram Stars | normal levels |
| Twist | Changes how it behaves, often in your favour: an astronaut that throws eaten balls back at the bricks, a meteor that makes bricks take +1… | gems or Telegram Stars (20% more than a Tame) | normal levels |
| Challenge | Makes it harder in return for bonus points | free | normal levels |
| Skin | New colours or shape only: gold, ruby, emerald, sapphire and more. It plays exactly the same. | Telegram Stars, with one free try for a level | every mode |
How long it lasts and what it costs
Hazards come in 3 price tiers (the tier is on each hazard's page). A Tame or Twist can be bought for one stage, one level or 24 hours with gems, or for 7 days or forever with Telegram Stars. An option's price also depends on how strong it is: about half to one and a half times the tier price.
| How long | Tier 1 | Tier 2 | Tier 3 | Notes |
|---|---|---|---|---|
| This stage | ◆ 10 | ◆ 15 | ◆ 20 | × the option's strength |
| This level | ◆ 30 | ◆ 45 | ◆ 60 | 3 × a stage |
| 24 hours | ◆ 100 | ◆ 150 | ◆ 200 | 10 × a stage |
| 7 days | ⭐ 40 | ⭐ 60 | ⭐ 80 | Telegram Stars (gems in the phone apps) |
| Forever ("Mastery") | ⭐ 120 | ⭐ 160 | ⭐ 200 | works at about 30% of the full strength |
| Skin, 7 days | ⭐ 15 | ⭐ 20 | ⭐ 25 | |
| Skin, forever | ⭐ 50 | ⭐ 60 | ⭐ 75 |
Challenges are free and add 10% × the challenge's strength to your points (about +5% to +15%). The exact price of every option is in the tables on the Hazards page.
Fair-play rules
- Tames, Twists and Challenges work in normal levels only, not in the daily challenge, weekly cup, endless or hard mode. Skins work everywhere.
- At most 2 Tames or Twists work on a stage, one per trait (size, speed and so on). If you own more, the strongest two are used.
- A level won with a Tame or Twist shows 🔧 next to your name on its leaderboard.
- Options bought or chosen during a stage work on that stage straight away. Hazards you've already hit keep their damage.
- A Mastery (forever) option works at about 30% strength: a size or speed change goes 30% of the way, and a yes-or-no option (like Cooled) works about 30% of the time.
- You choose which option is in use for each trait; "Use today's version" switches back to the normal hazard.
Which option should I buy?
- Stuck on one stage? A "this stage" Tame is the cheapest fix, and bought from the out-of-shots card it comes with a stage retry and bonus shots.
- Stuck on a whole level? "This level" costs 3 stages' worth and covers every stage.
- Playing a long session? 24 hours covers every level you play that day.
- One hazard always beats you? A Mastery is yours forever at about 30% strength, and it never runs out.
- Chasing the top of a leaderboard? Skip Tames (they add 🔧) and try a Challenge for bonus points instead.